Make every clocking tell the right story.
This guide explains the Timesheets workspace from the first click to a saved time card: choose the period, inspect the raw feed, correct missing or early/late clockings, add breaks, mark leave or RDO, and record the result for payroll.
The safe rhythm
Work on the live adjusted view. Make one group of changes, check the table totals, then select Record. Bulk tools change the screen first and show a “click Record to save” message; they do not persist until you record.
What you can manage here
1 · Choose the staff member and period
- Open Timesheets and stay on Staff Timesheets.
- In the staff tree, select the employee. The selected card shows the linked payroll profile; for this walkthrough, staff ID 1 is Peter FOLK.
- Set Period using the two date fields. For the example period, use 01/08/2026–15/08/2026. This Month and Last Month are shortcuts.
- Confirm the table’s Planning column. If the days have no schedule, select Apply Weekly Planning, choose the weekly plan, and select Apply. Applying a plan assigns the schedule; it does not by itself save clockings.
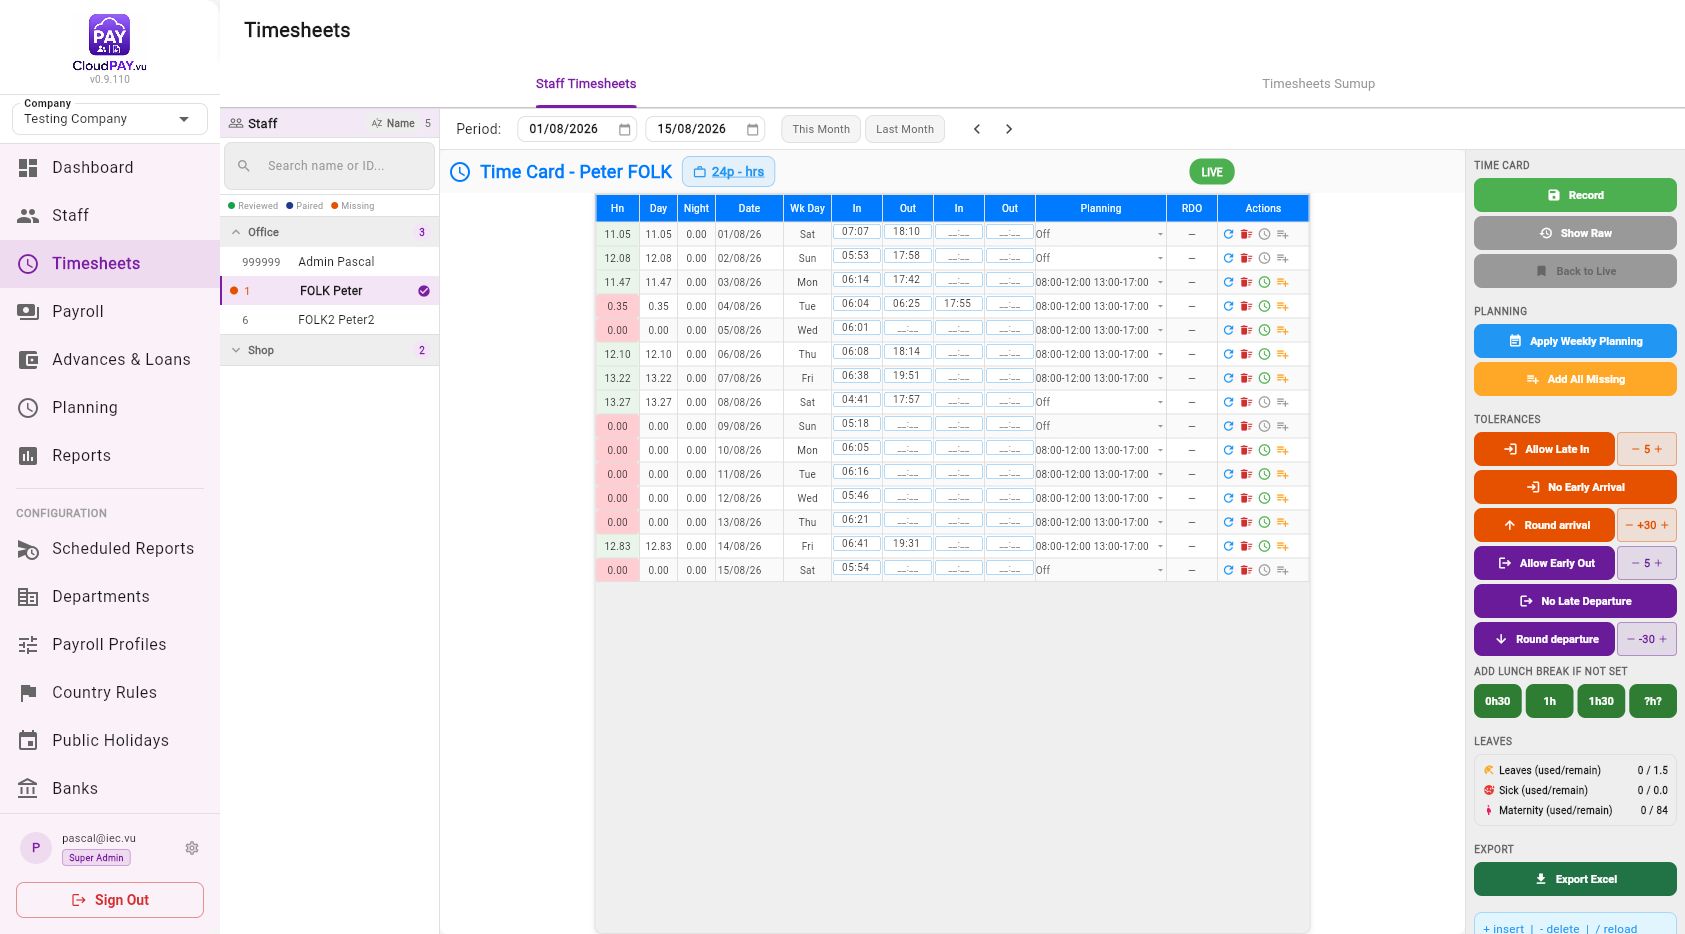
2 · Edit a clocking manually
Each In or Out cell is an editable time field. Use 24-hour HH:mm values such as 07:30 or 16:45.
- Click the cell and type the corrected time. A changed cell is highlighted so you can see what will be recorded.
- Keep each pair chronological: In before Out, and the first pair before the second pair. The page rejects a time outside the valid left/right order.
- Press Tab to commit the cell and move forward; use Shift+Tab to move backward.
- Use the row’s circular-arrow action to Reload original clockings for that day if you want to discard that row’s edits.
Row actions
| Icon/action | Use it when… | Result |
|---|---|---|
| Reload original clockings | You want to discard edits for one day. | Restores the imported/raw pair for that row. |
| Delete all clockings | The day should have no attendance clockings. | After confirmation, clears the row; mark leave/RDO separately if needed. |
| Fill clockings to match schedule | A time-based schedule should be the source of truth for the whole row. | Replaces the row with the schedule’s one or two planned pairs. |
| Fill missing clockings | A row has some clockings but fewer than the time-based schedule expects. | Inserts only the unmatched schedule times and keeps existing clockings. |
3 · Use the bulk tools
The right-hand panel applies a rule across the selected period. Run tools in a deliberate order: assign planning first, fill missing pairs, apply attendance rules, add breaks, then inspect and record.
| Button | What it changes | Important detail |
|---|---|---|
| Add All Missing | Compares existing clockings with each day’s time-based schedule and inserts missing schedule slots. | Works where a schedule exists and at least one clocking is already present; it does not invent a day with no clockings. |
| No Early Arrival | Moves an arrival earlier than the scheduled In time up to the scheduled time. | Removes unpaid early time; needs time-based planning. |
| No Late Departure | Moves a departure later than the scheduled Out time back to the scheduled time. | Removes unpaid late time; needs time-based planning. |
| Allow Late In | Forgives a late arrival within the displayed tolerance by using the scheduled In time. | Use the −/+ controls beside it to set the tolerance, up to 60 minutes. |
| Allow Early Out | Forgives an early departure within the displayed tolerance by using the scheduled Out time. | Use only when policy allows the grace period. |
| Round arrival | Rounds each In time up to the next interval (for example 07:35 → 08:00 at 30 minutes). | The interval is changed with −/+; this tool does not need planning. |
| Round departure | Rounds each Out time down to the previous interval (for example 16:59 → 16:30 at 30 minutes). | The interval is changed with −/+; this tool does not need planning. |
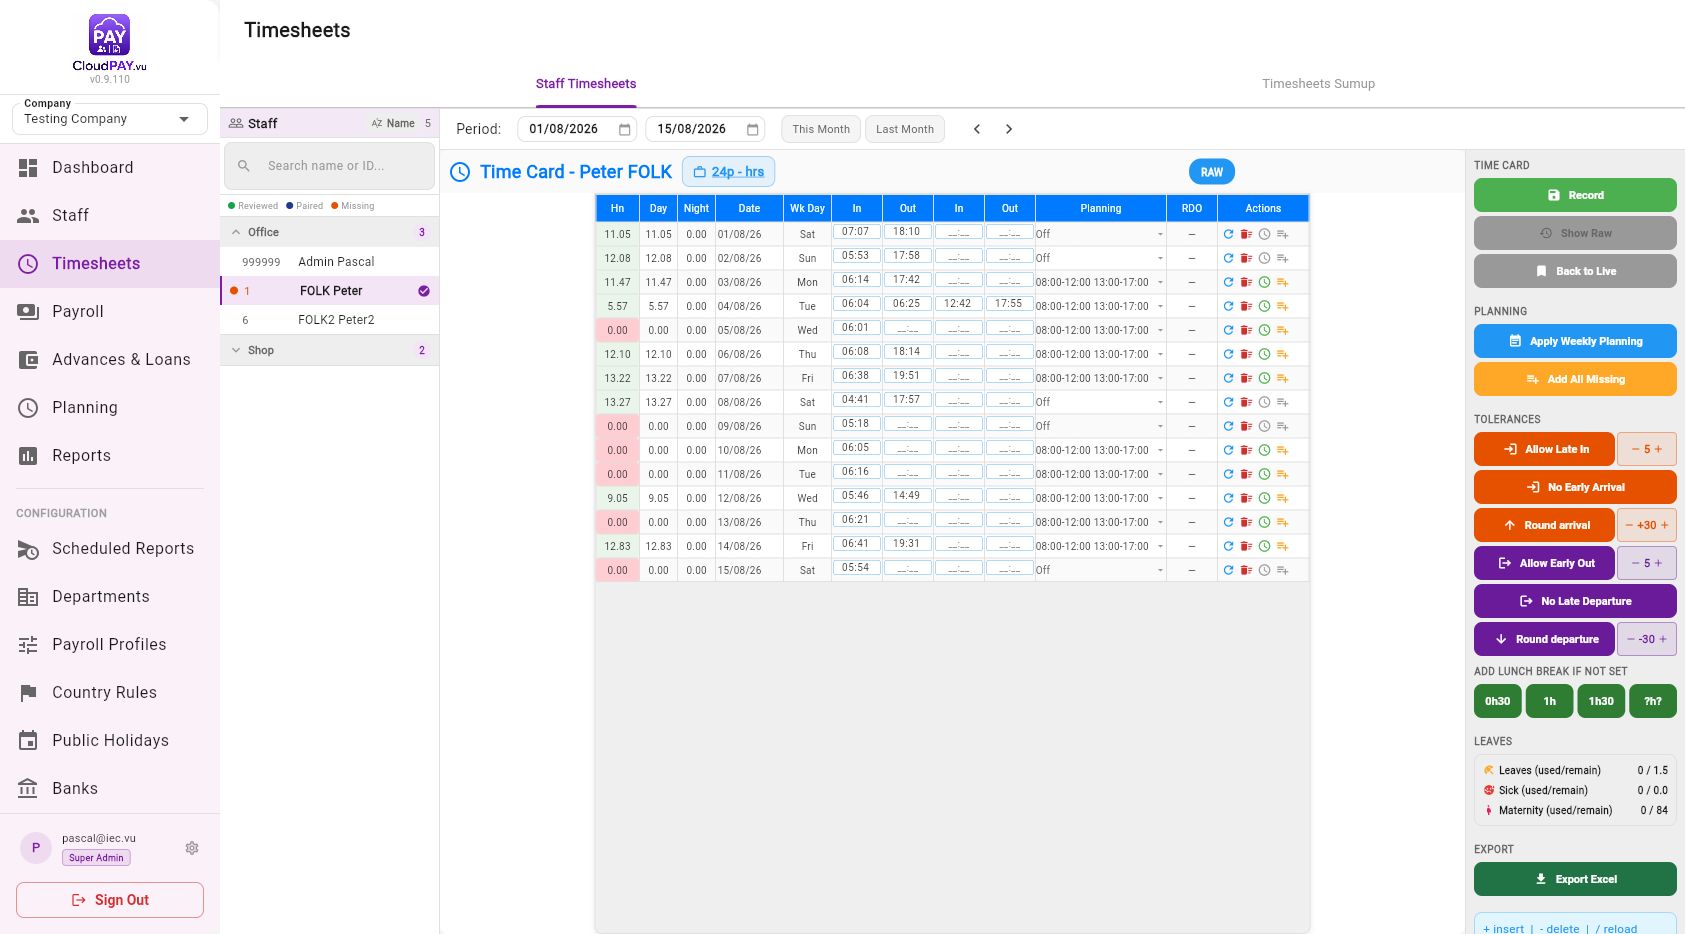
4 · Add a lunch break when none is recorded
Use the Add lunch break if not set controls for days that have exactly one In/Out pair. CloudPay inserts a centered break and leaves days with an existing break or no pair unchanged.
- Choose 0h30, 1h or 1h30 from the right panel. The selected duration is applied across eligible rows.
- For another duration, select ?h?, enter Hh:Mm (for example 1:30), then choose Add break.
- Custom duration must be between 0h10 and 3h00. Review the new In/Out pair around the center of the shift.
- Check the row total and select Record when correct.
5 · Mark leave, sick leave, RDO or maternity leave
For a scheduled day with no clockings, open the row’s day-status menu in the Actions column. The menu lets you classify the day without inventing attendance times.
| Menu choice | How it works | What to check |
|---|---|---|
| Leave (Full Day) / Leave (Half Day) | The choice is based on the day’s planning hours; a short planned day is treated as half-day leave. | Check the leave counter and the staff’s remaining balance. |
| Sick Leave | Marks a full sick-leave day. | Confirm the sick balance and supporting approval. |
| RDO (use balance) | Prompts for RDO hours and limits the value to the available bank and the planned hours remaining. | The RDO column shows the hours used. Select the small close icon to cancel and re-credit it before saving. |
| Maternity Leave | Opens a date-range flow that sets the maternity block across the full range. | Use Cancel Maternity Leave on a maternity row to clear the block. |
| Cancel | Clears the leave/RDO classification for the row. | Record the corrected day after reviewing the table. |
6 · Record the adjusted timesheet and export
- Read the table totals: Hn (hours), Day, Night, date/day, paired In/Out values, planning and RDO.
- Review the right-side leave counters: Leaves (used/remain), Sick (used/remain) and Maternity (used/remain).
- Select Record. The save includes adjusted clockings and planning assignments. Wait for the success message and reload confirmation.
- For a spreadsheet copy, select Export Excel. The export includes clocking pairs, day type, planning and adjustment information.
If another user changed the same timesheet
When CloudPay detects a conflict, your edits are not silently overwritten. Choose Reload to load the latest copy and review again, Overwrite only when you are authorised to replace the other change, or Cancel to stop.